Explanation of the importance of composition in travel photography
Travel photography is a way to capture the beauty of the world, to create memories, and to share our experiences with others. However, just taking a photo is not enough to capture the essence of a place or a moment. To create truly compelling travel photographs, it’s important to understand the principles of composition. Composition is the arrangement of visual elements in a photograph, and it is what gives a photo its visual impact.
In travel photography, composition is particularly important because it can help convey the emotions, sensations, and atmosphere of a place. A well-composed photograph can tell a story, evoke a mood, and transport the viewer to another time and place. On the other hand, a poorly composed photograph can be dull, confusing, or uninteresting.
Brief overview of the topics to be covered
In this blog post, we will discuss some of the most important composition techniques for travel photography. We will start with the rule of thirds, which is a basic principle of composition that can help you create balanced and visually appealing photos. Then, we will move on to leading lines, which can help you create depth and guide the viewer’s eye through the image. We will provide examples of travel photos that illustrate these concepts and explain how to apply them in your own photography.
Rule of thirds
Definition of the rule of thirds
The rule of thirds is a composition technique that involves dividing an image into thirds, both horizontally and vertically, creating nine equal parts. The idea is to place the main subject or point of interest at one of the points where the lines intersect or along one of the lines, rather than in the center of the frame. This creates a more balanced and visually pleasing composition, as it allows the viewer’s eye to move around the image and creates a sense of harmony and balance.
Explanation of how to apply the rule of thirds in travel photography
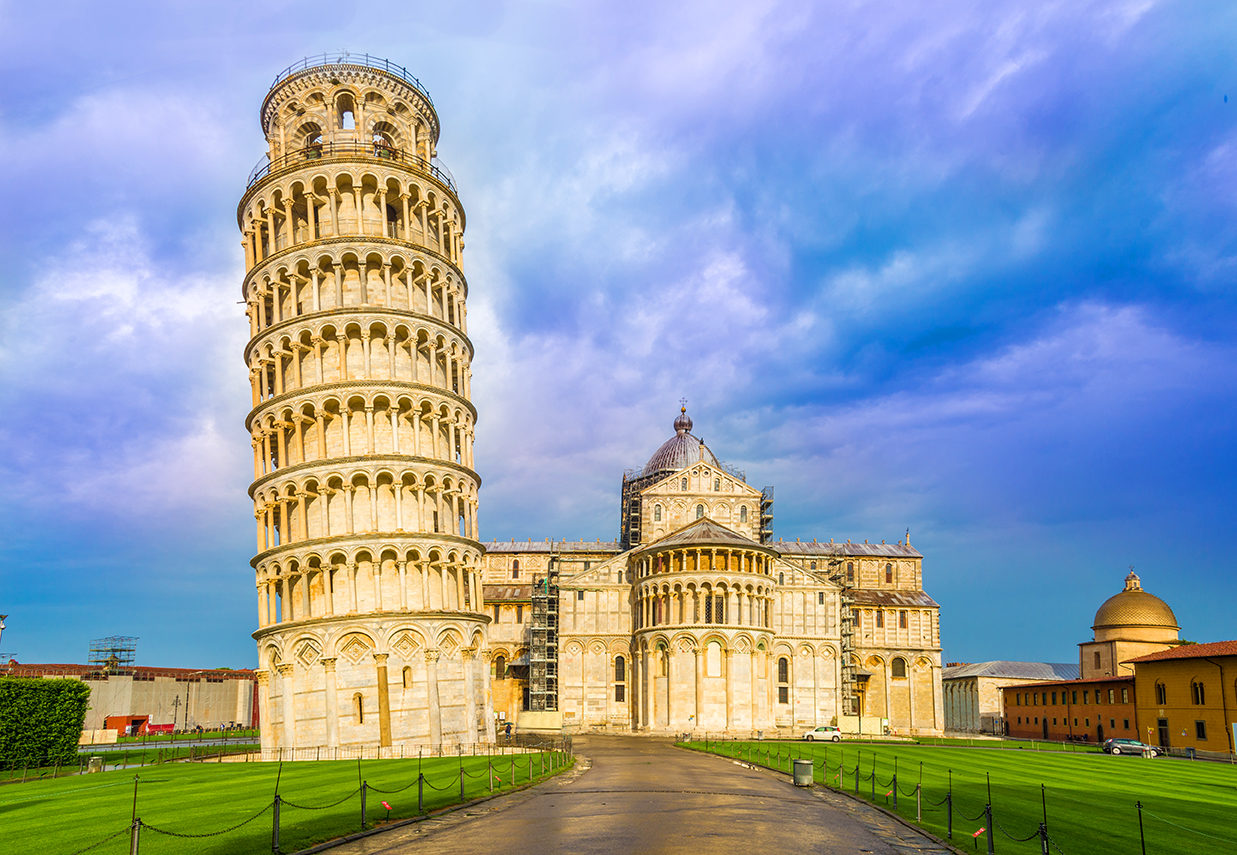
To apply the rule of thirds in travel photography, start by imagining a grid of lines dividing the frame into thirds. You can do this mentally or use the grid overlay function on your camera or smartphone. Then, place the main subject or point of interest at one of the intersections or along one of the lines. For example, if you’re photographing a famous landmark, you might place it at the intersection of the upper-left line and the right-hand vertical line. If you’re photographing a person, you might place their eyes along the upper horizontal line.
It’s worth noting that the rule of thirds is not a hard and fast rule – there will be times when it makes sense to place the subject in the center of the frame or to break the rule altogether. However, as a general guideline, the rule of thirds can help you create more visually balanced and interesting photos.
Examples of travel photos that follow the rule of thirds
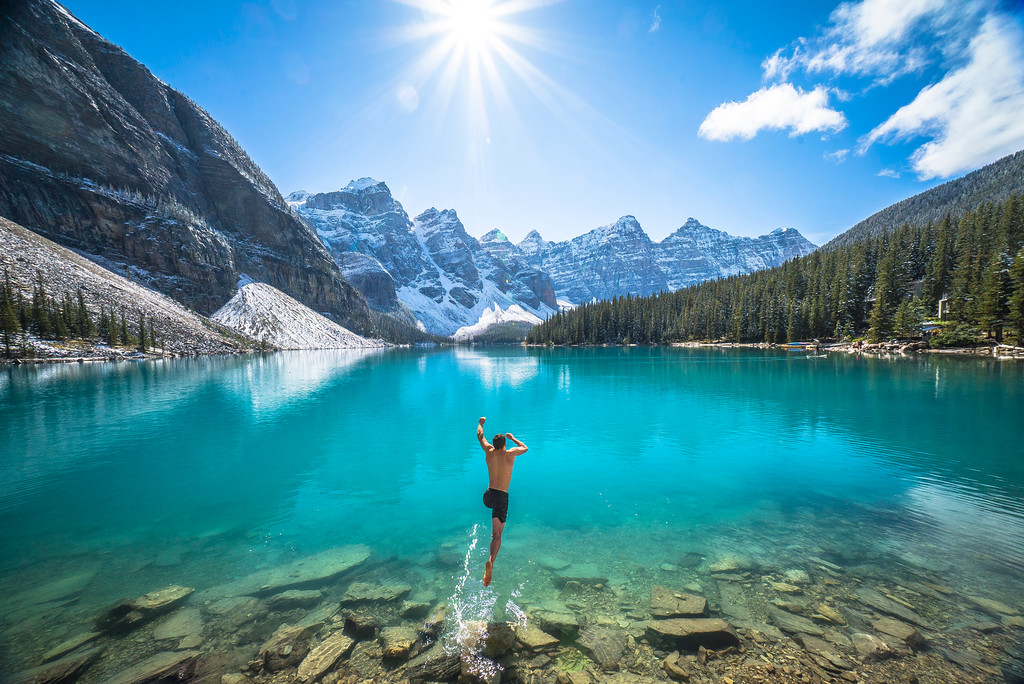
- A photo of a mountain range, with the peak of the tallest mountain at the upper-right intersection of the rule of thirds grid.
- A photo of a person walking down a street, with the person’s head and shoulders along the upper horizontal line.
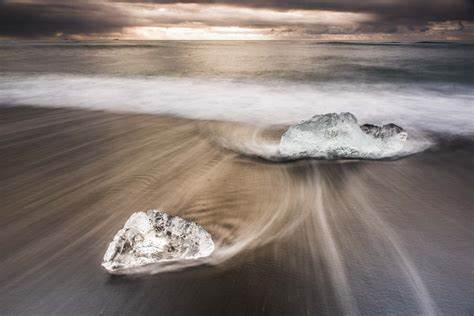
- A photo of a beach, with the horizon along the lower horizontal line and the sun setting at the left-hand vertical line.
Leading lines
Definition of leading lines
Leading lines are lines or shapes in a photograph that lead the viewer’s eye through the image and create a sense of depth and dimension. Leading lines can be natural or man-made, straight or curved, horizontal or vertical. They can be roads, fences, railings, buildings, or any other element that creates a visual path through the image.
Explanation of how to use leading lines in travel photography
To use leading lines in
Framing
Definition of framing
Framing in photography refers to the technique of using elements within the scene to create a frame around the subject or main point of interest. By incorporating foreground elements, archways, windows, branches, or any other object that can naturally create a frame, you can add depth and context to your travel photographs. Framing serves as a visual guide that directs the viewer’s attention towards the subject, making it more compelling and engaging.
Explanation of how to use framing in travel photography
To effectively use framing in travel photography, keep an eye out for elements in the environment that can act as natural frames. Look for arches, doorways, windows, trees, or any other objects that can help create a frame within your composition. Position yourself and your camera in a way that allows you to capture the subject within the frame, ensuring that it remains the main focal point. Experiment with different angles and perspectives to find the most visually appealing composition.
Framing can also provide context to your photographs. For example, framing a subject with the branches of a tree can convey a sense of being surrounded by nature. Framing a person through a window or a doorway can suggest a glimpse into their world or a specific location. By using framing techniques, you can add storytelling elements to your travel photographs, enhancing their overall impact.
Examples of travel photos that use framing
- A photo of a bustling street market captured through an archway, with the colorful fruits and vegetables framed by the arch, creating a sense of entering a vibrant world of flavors.
- A landscape photograph of a majestic mountain range framed by the branches of a tree in the foreground, giving a sense of the immensity and beauty of the natural surroundings.
- A portrait of a street performer taken through the iron bars of a fence, with the framing adding an element of mystery and intrigue to the image.
Point of view
Definition of point of view
Point of view (POV) in photography refers to the position from which the photographer captures an image. It determines the relationship between the viewer and the subject, influencing the overall impact and storytelling of the photograph. By exploring different points of view, you can create unique and captivating travel photographs that offer fresh perspectives and evoke a strong sense of presence.
Explanation of how to use point of view in travel photography
When it comes to point of view in travel photography, don’t limit yourself to eye-level shots. Instead, experiment with different angles and heights to discover interesting compositions. Try shooting from a low angle, capturing a subject against the backdrop of a vast sky or towering architecture, to emphasize its grandeur and dominance. Alternatively, shooting from a high vantage point, such as a rooftop or a hill, can provide a bird’s-eye view and showcase the intricate details of a cityscape or landscape.
Changing your point of view can also help you tell a specific story. For instance, getting down to ground level to photograph a local vendor preparing street food can capture the essence of the bustling street scene and convey a sense of authenticity. Experimenting with various points of view allows you to see the world from different perspectives and present it to viewers in a fresh and compelling way.
Examples of travel photos that use different points of view
- An aerial shot of a winding river cutting through lush green valleys, showcasing the vastness and natural beauty of the landscape.
- A low-angle shot of a towering cathedral, capturing its intricate architectural details against the backdrop of a dramatic sky.
- A close-up shot taken at ground level, capturing the worn hands of a craftsman meticulously creating traditional artwork, conveying a sense of dedication and craftsmanship.
Symmetry and patterns
A. Definition of symmetry and